
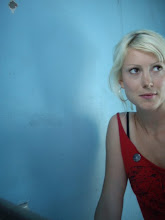
Montage attempt using Photoshop during week 5 class
Producing quality images:
- Do not touch the lens, this can make the light refract with the image is taken and warp the image.
- Stay away from moisture, wet days, the beach, windy days. If wanting to take a picture in these conditions, wait for the right moment and quickly store.
- Use silica to absorb moisture.
- Use of tripods is important. Gorilla tripods is an option
- If you cannot use a tripod, use settings 1/60 } 18-55 where the shutter speed is high (2.8, 3.5, 4.5) otherwise the camera will shake and get out of focus. The shutter when it flips up may also cause camera shake.
- Print size and sensory size is important. For 5-8MP use A4 - A3 size print. 8MP and up use A3-A2 size print.
Photo Montage - Shooting in a rar file enables you to process your images 2 or 3 times and blend using a mask techniques where the tonalities are even.
USE RAR files exploit the data available to you
When using Bridge you can open any image in the window even if its jpeg file. To do this select the image right click and select 'open in camera raw' option.
Colour Zone System
RBG red blue green 256 (include 0)
R=0 B=0 G=0 which will make Black
R=255 B=255 G255 will make white
Photoshop is not a tool to fix mistake, get it right in camera. Photoshop will enhance your vision. Avoid pixel editing as it will destroy your image.
MONTAGE:
Making a montage with 3 self portraits in the one photo.
We went on a mission to find an empty lecture hall to take pictures.
In photoshop open the images, move the image tab to outside the picture showing to display in its own window. Select an image, hold shift key and drag on top of another image. Go to Layers, layer mask, hide all. Be aware to click on the layer, NOT the thumbnail as this will paint on top of the image. Select paintbrush tool (make sure al setting are 100% and normal) use a soft brush and 0% on all brush setting. If any errors, change the fill colour from black to white or vise versa.
Change history setting. Preferences, performance, history stats to 100 (it will be defaulted to 20). This will allow your history to member up to 100 clicks.
SAVE the image as pst or tif, do not save to JPG as this will FLATEN the image and finalise the image so no more changes can be made.
No comments:
Post a Comment